I wanted a factory roof rack for my Flex when I was looking to purchase. The car I ended up buying did not have one factory fitted. However, I knew from my research on fordflex.net that adding one wouldn’t be an issue. However, after going through all of the posts, there was conflicting information- did I need to purchase new drip rails or not? Did I need to drop the headliner in order to install? Did I need t purchase new retaining clips?
Well, dear reader, read on and this blog entry will answer those questions and (hopefully) more!
Update: I see that user Unobtainium has posted a roof rack DIY install on fordflex.net between the time I started writing this entry and actually finished it. He pretty much did the same install I did. I wish I had finished this article sooner to avoid duplication of effort for him or he wrote his DIY sooner so I would have his guide to do my install and not have to create this blog entry. I chose to finish my article for the sake of the community and the fact that I ran into some issues that others may run into. Forewarned is forearmed I always say!
Highlights:
- You do NOT need to touch the headliner in order to install factory roof racks (even though the included instructions say that you do- at least on my 2014 Flex with Vista Roof). There is a “trick” that eliminates the need to get access to the front retention screw that removes the need to drop the headliner. (Read on to discover the “trick”.)
- If you order the factory Ford roof rail kit below, it will come with new drip rails with punched out holes for the roof rack- you do not need to modify your own or buy them separately
- Installation took me about an hour for my first go around (It took this long because I was going slow and didn’t want to break anything)– if I had to do it again it would probably take about 30 mins- it is really that easy.
Part Numbers:
- DA8Z7455100AA Black roof rails (From the appearance package- same as the ones installed here.)
- DA8Z7455100BA Chrome roof rails (The default for all Flexi without the appearance package)
I was able to get a good deal by buying them online from Varsity Ford via fordparts.com for $294 with $9.95 FedEx shipping. Not sure if they had a promotion going on or not, but everywhere else I checked, shipping ranged from $55 to $90! (Others have reported getting even better online pricing than I did when I wrote this- so it pays to shop around.)
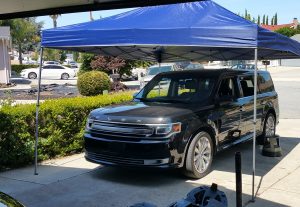
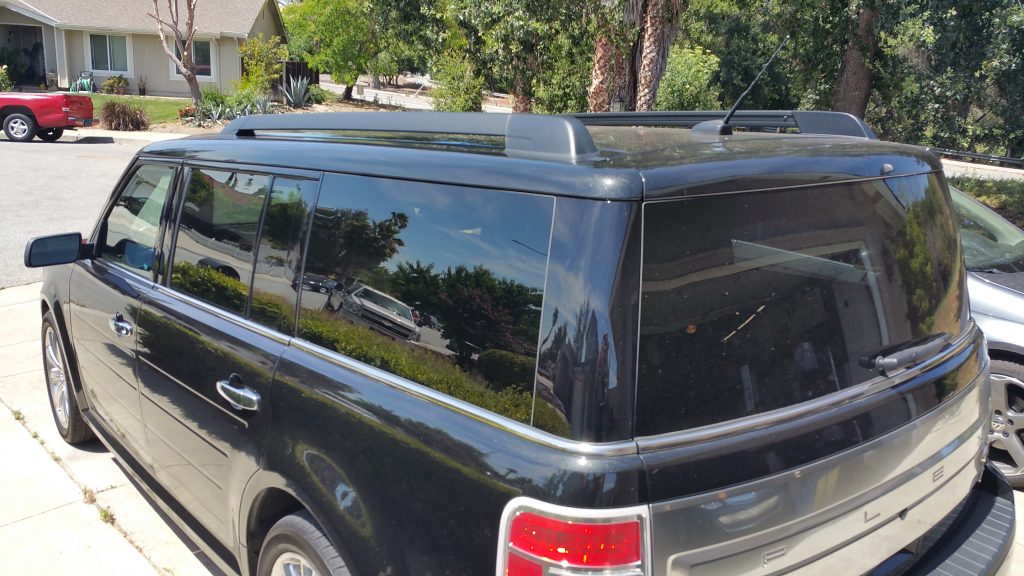
Get comfortable… a hot day doesnt make for a fun factory roof rack install!
Tools & Supplies Needed:
- Factory Ford roof rack kit
- Butyl rubber (or other waterproofing material- RTV?)
- 8mm socket
- Torque wrench
- “punch tool”
- Plastic “pry bar” to remove the original drip rail (I used this kit from harbor freight)
Procedure:
-
-
-
-
-
-
- Open the boxes your factory roof rack come in and inspect the contents. Check the contents for damage and make sure you get 2 rails, 4 covers and 2 new drip rails with holes for the new rack and hardware needed for installation. Pay particular attention to the new drip rails. One of mine was slightly bent from shipping. Luckily it wasn’t too much of an issue as I was easily able to bend it back into position.
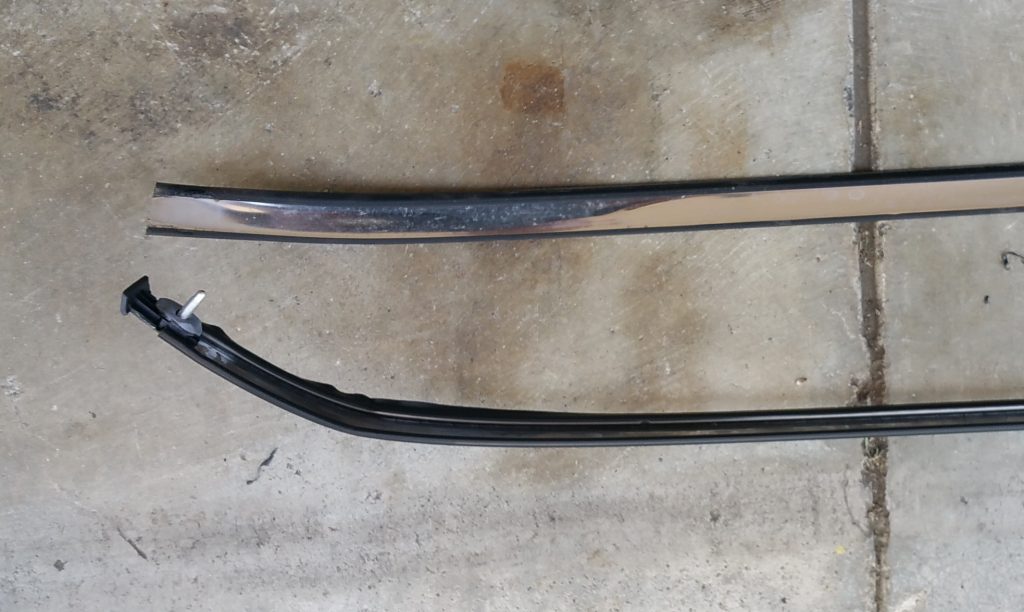
This closeup of the new drip rails for the roof shows that one of the rails was bent during transport. The upper one is correct. The bottom one is bent too much. Luckily it was easy to bend back into shape. Be sure to check yours. If it was bent too much, you will have a permanent kink and the rail will not stay flat.
Also, on my rack, the screws that hold the center section cover were improperly installed and effectively stripped the hole’s threads. This caused the covers to move a bit and it bothered me. A trip to the local hardware store for slightly larger black sheet metal screws solved that problem.
- Remove the factory drip rail from the roof. The drip rail is just held on with four plastic retainers in the middle and back of the rail and a front fastener that keeps the rail from popping up in the front . I used a small nylon pry bar to remove mine in the back and middle.
With most of the drip rail unseated from the top of the car, you will need to focus on the front, and this is where the “trick” comes in that eliminates the need of dropping the headliner to access the front screw.Basically, instead of unscrewing the front screw to release the front retainer, you will “slide the rail out” of the front retainer by pulling it back towards the rear of the vehicle, being careful not to break the front plastic/rubber retainer.
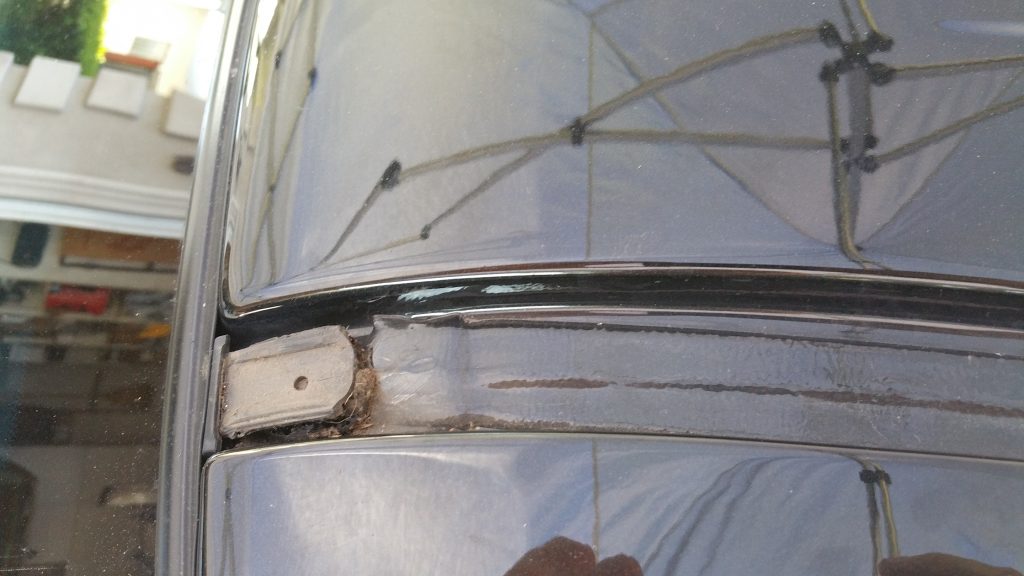
This picture shows the front retainer that has had the drip rail “slid out” of it to avoid dropping the headliner to remove the screw inside the car that holds this retainer in place. The new drip rail will first slide into this retainer and then snapped into the remaining grey clips already bolted to the car.
Once removed, you can toss them or keep them. I chose to keep mine in case I wanted to remove the rack for any reason.
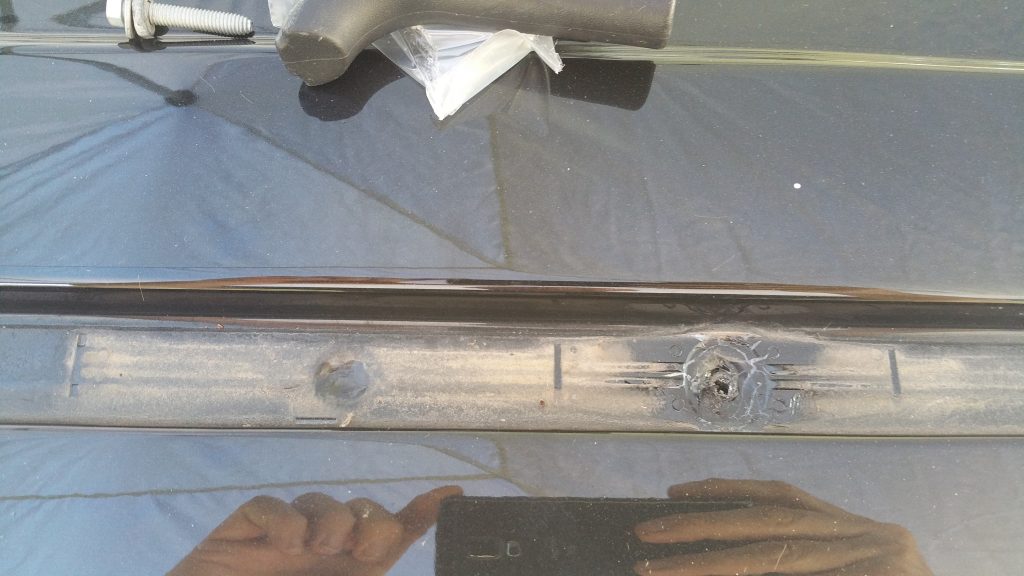
- Remove two (the 2nd and 4th ones from the front) of the grey drip rail retainers by removing the 8mm bolts and toss or keep with the original drip rails. The removed ones are in position of where the new roof rack will mount.
If you accidentally remove the wrong grey drip rail retainer clips (say, the 3rd one like I did by mistake), make sure you reinstall them correctly. I didn’t notice that the clips are asymmetrical and have a certain installation position. There are arrows molded into the clips to tell you the correct position, but I didn’t notice this when I reinstalled. Because I had them flipped 180 degrees, I couldn’t get them to hold down the new drip rail. Once I flipped them into the correct position, the new drip rail easily snapped into place.
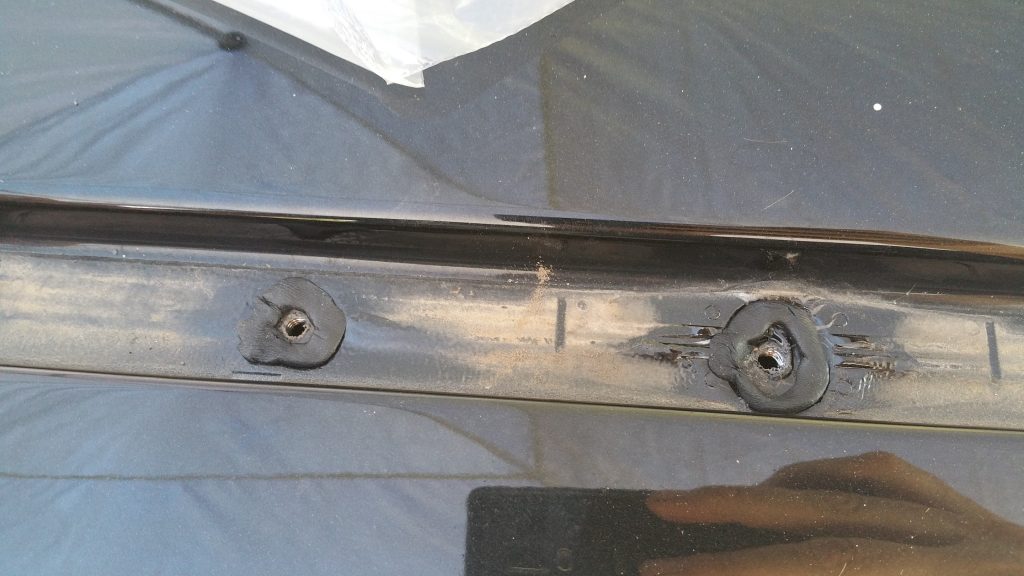
Once removed, you will see the original hole where the retainer was as well as a new hole covered up with sealant. This is where the rack will mount to the roof.
- Open the boxes your factory roof rack come in and inspect the contents. Check the contents for damage and make sure you get 2 rails, 4 covers and 2 new drip rails with holes for the new rack and hardware needed for installation. Pay particular attention to the new drip rails. One of mine was slightly bent from shipping. Luckily it wasn’t too much of an issue as I was easily able to bend it back into position.
-
-
-
-
-
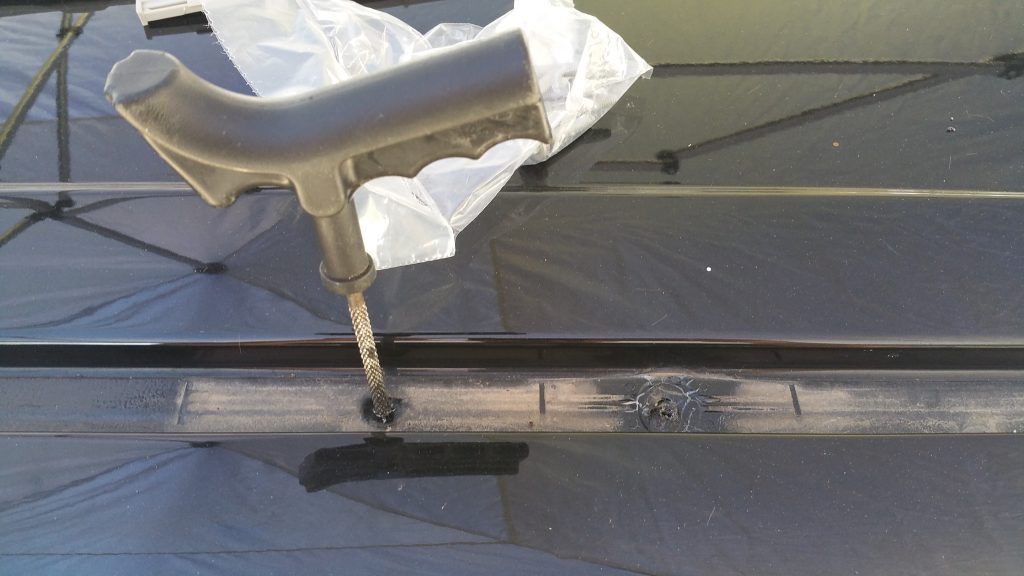
Once the original plastic retainer is removed, you will see a new hole with sealant over it. We will need to poke a hole through this sealed hole to use it to mount the roof rack.
-
-
-
-
-
-
- Insert something (I used a flat repair auger from fix-a-flat kit) to break the factory sealant over the 2 covered mounting holes on each side of the car. Make sure all the threads are clean and be careful not to poke too far down and damage the headliner.
- Once the holes are clear, you will need to install some new sealant around holes to keep water from entering the cabin when the roof rack is installed. I used butyl rubber I had left over from another project, but you can use RTV if you like as well.
I used butyl rubber I had lying around from another project to seal the roof rack holes.
Butyl rubber laid out in circular fashion. Don’t use too much or too little.
- Once the sealant is placed around the mounting holes, install the new drip rail (with the roof rack mounting holes already punched into it).
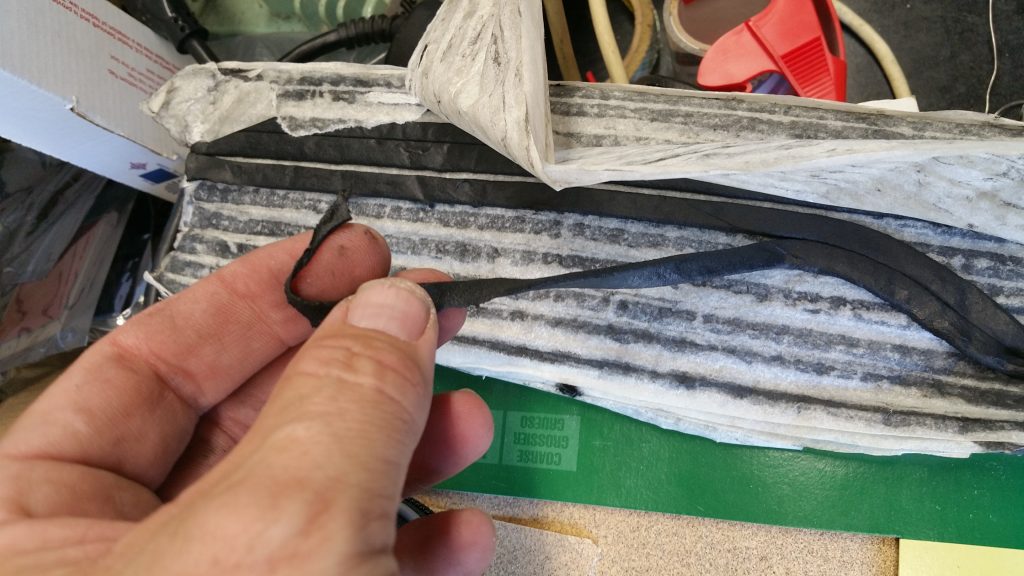
First, you will need to remove the factory installed front retainer from the new drip rail.
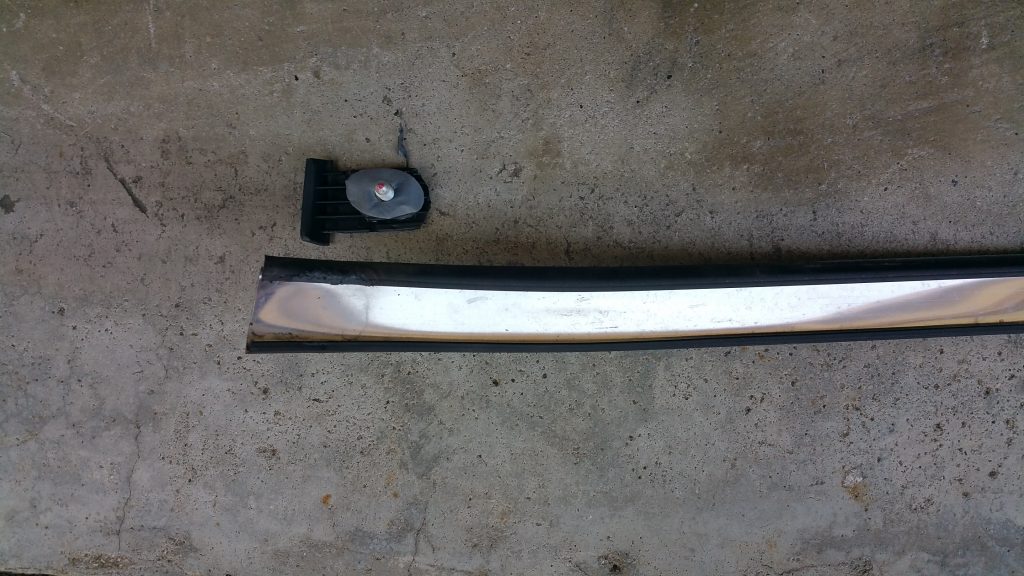
Remove the new factory installed front retainer by sliding it out from the rail. I was able to use my hands to slide it out of the rail. Be careful not to bend the rail while removing.
Then, with the retainer removed from the new drip rail, install the new rail on the roof by slowly inserting the new rail channel into the old front retainer. Go slow to avoid breaking the front retainer and not bending the rail too much to cause it to pop up away from the roof.
Once the front part of the rail is inserted, carefully bring down the rest of the rail and snap it into the original grey rail retainer clips.
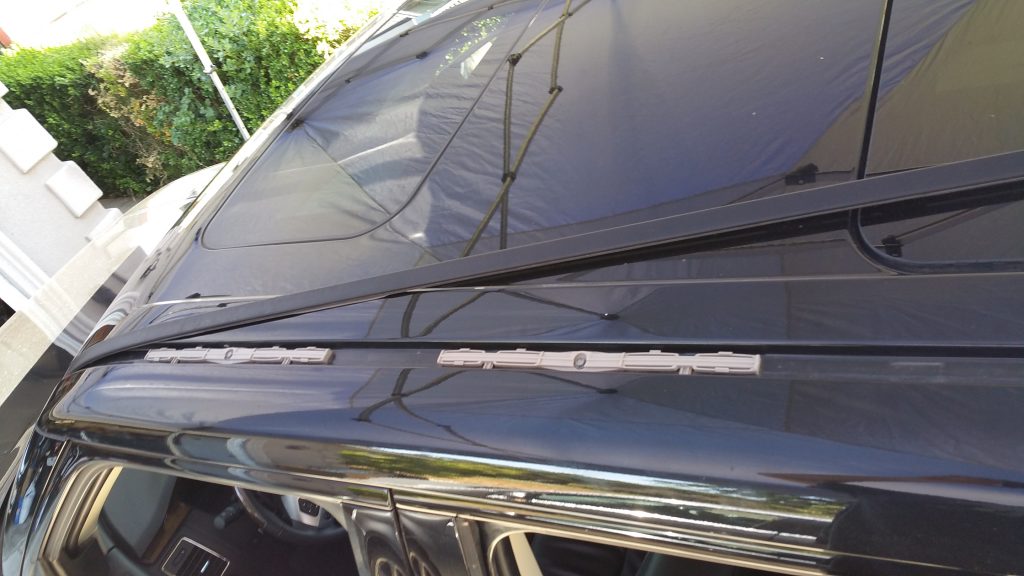
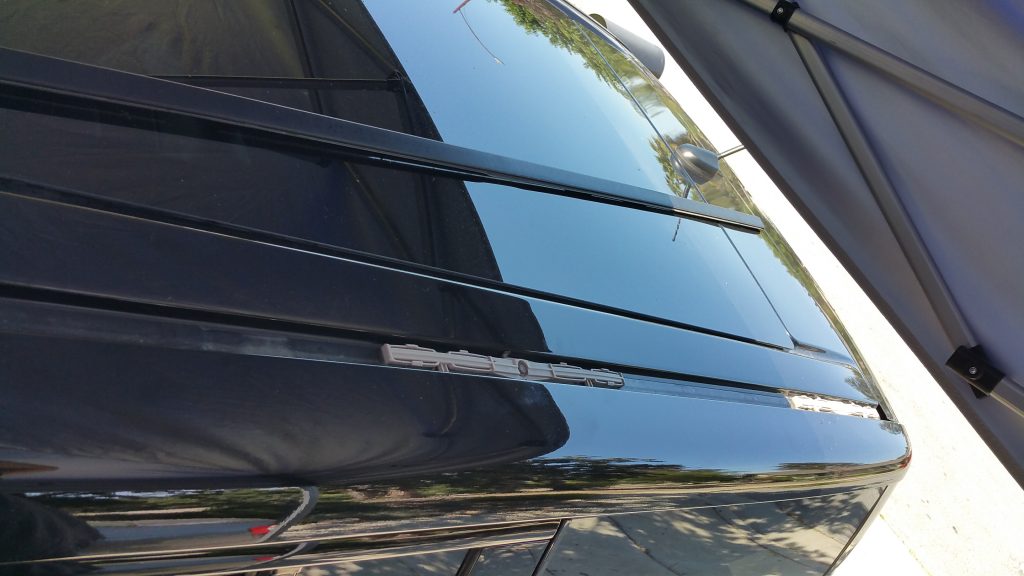
When done, you should notice the holes in the new drip rails line up perfectly the screw holes in the roof.
- Now grab one of the new roof rack rails (they are keyed to each side and are not symmetrical) and position them so that the holes line up with the pre punched holes in the drip rail.
- Insert something (I used a flat repair auger from fix-a-flat kit) to break the factory sealant over the 2 covered mounting holes on each side of the car. Make sure all the threads are clean and be careful not to poke too far down and damage the headliner.
-
-
-
-
-
-
-
-
-
-
-
- Insert the 8mm screws that came from the old grey retainer and from the roof rail hardware kit and install them into the roof rack being careful to make sure the screws are ABSOLUTELY CENTERED within the oblong mounting holes in the rack. If they are not, your roof rack front and rear covers will have gaps in them. (Ask me how I know.)
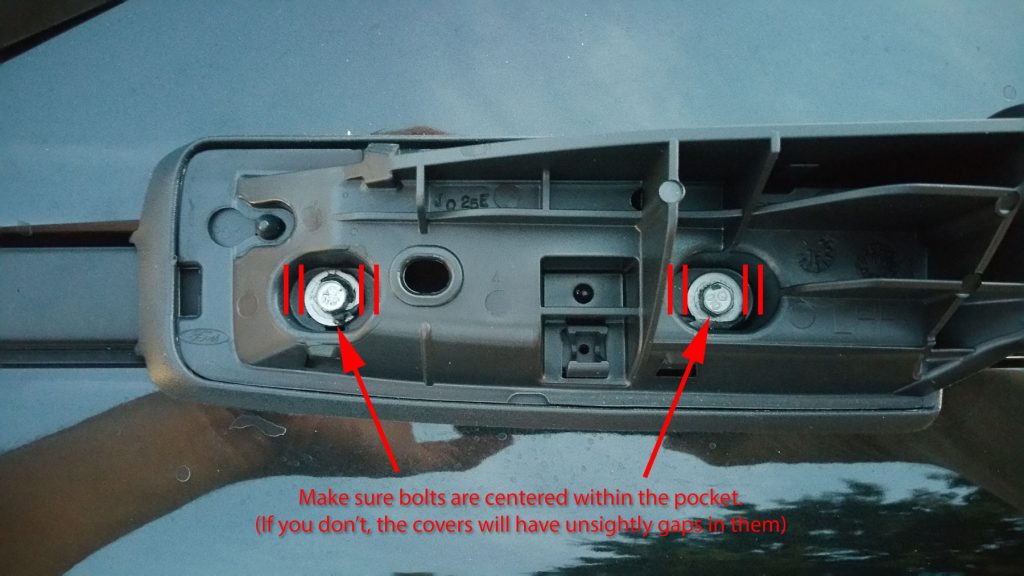
Make sure the new roof rack mounting screws are perfectly centered within the oblong holes. If you don’t, the rack covers will have huge gaps in them.
This is the gap you’ll get between the roof rack covers and the actual rack rail if you don’t make sure the mounting screws are perfectly centered within the roof rack mounting holes.
- Insert the 8mm screws that came from the old grey retainer and from the roof rail hardware kit and install them into the roof rack being careful to make sure the screws are ABSOLUTELY CENTERED within the oblong mounting holes in the rack. If they are not, your roof rack front and rear covers will have gaps in them. (Ask me how I know.)
-
-
-
-
-
-
-
-
-
-
-
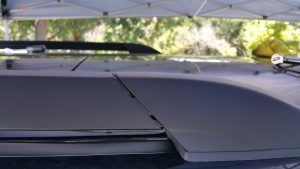
- Repeat the same procedure for the other side and install the roof rack caps front and rear that came with the kit. Sit back, grab a beer and admire your work!
-
-
-
-
-
All done and lookin’ good!
Conclusion:
This project was much easier than I thought it would be since I didn’t have to drop the headliner. You can save yourself a bunch of money by buying online and installing yourself instead of paying the dealer to do it for you.
With this DIY how to article at hand, I would think you could install the rack on your own in about 30 minutes. It is really just that easy!
If you have any questions or notice any problems with this how to, please leave a message in the comments section. Thank you!
Categories: 2014 Ford Flex Ecoboost, Vehicles
Can you include the factory part numbers that you used?
And is this the same kit/part numbers to install on “pre-2013” Flex models??
Thank you for the write up, greatly appreciated!!!!
The part numbers for the rails I used are listed at the beginning of the article. I used the black ones as mentioned in the article as well. My understanding is that the rails fit all Ford Flexes, regardless of year. Glad you find the article handy!
Great walk-through, thanks Teksavy! Just finished our 2015 Flex limited, no sunroof. Everything went cleanly. The only interesting side note is that the washer on the bolts used to secure the roof rails are a little small and if you over-tighten, it will sink through the plastic beneath.
I actually had the same thing happen. I just backed off on the tightening and everything was fine luckily. Thanks for your comment.
If you order the roof rails on an SE they will be black, not chrome.
You can order black or silver. I prefer black. Just need to the right part number. 🙂
Truly, I appreciate you the writer. I did myself because of your story and direction.
I had a hard time removing the installed front retainer.
People who are going to install, you may tuck plier between the retainer and rail and use a hammer to take apart.
Thank you for sharing your experience.
Thanks for taking time to comment. Glad I could help.
Yes – thanks for the detailed How-To – clear and easy to understand!
Did I miss this or does anyone know if all Flex have these mounting positions under the strips?
I have a 2009 SEL.
1 other question for a 2009 Flex, does anyone know the correct part number for the black rails?
And what does “comment is waiting moderation” mean?
Thanks!
The part number is DA8Z7455100AA Black roof rails (From the appearance package- same as the ones installed here.). As mentioned in the article. Moderation means that I have to approve your comment before it is posted. (Spam stuff).
The “screw holes” are there under tape.
Hello, according to Ford Canada Parts website (https://www.eastgatefordpartscanada.ca/oem-parts/ford-roof-rails-black-da8z7455100aa), the part number da8z7455100aa does not fit 2012 Ford Flex. Anyone have successfully installed this PN on a pre-2013 Flex?
Regards,
I don’t think the mounts are different, but I cannot say for sure since I don’t have a 2012 or older car. Do a search on http://www.fordflex.net forums, you might find your answer there.
has anyone tried to install the racks further forward?
The racks came installed on my Flex and due to kayak loading I want it farther forward so boat is not hanging out behind.
I haven’t heard of anyone doing that and I don’t see how it could be done due to the molded plastic pieces. If you find a solution, please let me know.
I have a 2009 SEL with the vista roof. The luggage rack was NOT an option with a vista (glass) roof. Rumor was that the vehicle would be “top heavy” and increase roll over at high speeds. Sounds conservative and Im installing the luggage rails. Awesome post. similar question… has anyone installed 2014-2019 rails on a 2009-13 vehicle? Ford is claiming the later rails WILL NOT fit the earlier car. Not sure of the issue. If just color, then black is fine. Chrome ones may be more proper. Recap: 1) will 2014-2019 rails fit 2009-13 ?? 2) does the same assembly instruction work for the earlier one (avoiding the headliner drop).
Same question… I have a 2009 limited and want to put factory rails on it for a basket….
I’m sorry, I don’t know. You could take off your roof rails to see if your holes look like mine (2014). If so, you should be ok. But I don’t have an older flex to check.
Just installed Ford’s black rails on my 2019 Flex (with Vista Roof) using your instructions here. One note from me…
The front retainers were “crimped” into the new drip rails and very difficult to remove until I inserted a small flat blade screw driver in under the crimps and pried them open. Then the retainers could be “slid” out.
Also, in retrospect, the racks were pre-attached to the new drip rails, and kinda heavy and unwielding, difficult to maneuver by yourself while trying to “slide” the drip rails onto the front retainer clips. If I did it again, I would temporarily prop up the rear ends of the new racks with a small sheet of cardboard (or something) while sliding onto the front retaining clips. Then remove the cardboard prop when dropping the rear rack down onto all the wet RTV around the bolt holes.
Thanks for the detailed note. I hope this helps others.